
Learning how to schedule blog posts in WordPress automatically helps you share your content at the right time without being online. You can write your posts whenever you have time and set them to publish on a date and time that fits your plan. This makes it easier to stay consistent, save time, and keep your blog active even when you are busy. When you use the scheduling feature in WordPress, you can plan your posts ahead of time and keep your content organized.
Scheduling blog posts is helpful for many people. If you are a blogger who wants to post regularly, a business that shares updates or promotions, or a creator who wants to stay active online, scheduling can make your life easier. It helps you stay connected with your readers, customers, or followers even when you are away. With scheduled posts, your audience will always see new and fresh content on time.
In this guide, you will learn everything about how to schedule blog posts in WordPress automatically. You will understand what scheduling means, why it is important, and how to do it step by step. You will also learn how to edit or change a scheduled post if you need to and discover useful tools that make the process faster and simpler. By the end, you will know how to manage your WordPress blog easily and never miss a posting deadline again.
What Is Post Scheduling in WordPress?
Post scheduling in WordPress means setting a future date and time for your blog post to be published automatically. Instead of posting right after writing, you can plan exactly when it appears on your website.
This feature helps you manage your content in a consistent and organized way. You can plan your publishing schedule, prepare posts in advance, and make sure your blog stays active even when you’re busy.
Here’s how post scheduling can make your blogging easier:
- You can post at the best time when your audience is most active, even if you’re not online.
- You can prepare multiple posts in one sitting and schedule them across the week or month.
- You can maintain a steady flow of content, which helps improve SEO and keeps readers engaged.
Why You Should Schedule Posts Automatically
Scheduling your blog posts automatically in WordPress is one of the best ways to stay consistent and organized. It allows you to plan your content in advance and keep your blog active without needing to log in every time you want to publish something.
When you use automatic scheduling, your posts go live exactly when you want them to, even if you’re asleep, traveling, or busy with other work. This simple habit can make a big difference in how your blog performs and how your readers engage with your content.
Here’s why automatic post scheduling is so useful:
- Keeps your blog active even when you’re offline
You don’t need to worry about missing posting days or forgetting to publish. WordPress handles it for you. This helps you maintain a steady flow of new content, which keeps your audience interested and encourages them to return regularly. - Saves time and helps plan content ahead
Scheduling lets you batch-write your posts and set them to publish over time. This way, you can focus on other important tasks while your content goes live automatically. It’s a great way to stay productive and avoid last-minute stress. - Improves SEO and audience engagement
Posting regularly tells search engines that your website is active and updated, which can help improve your rankings. It also builds trust with your readers since they know when to expect new content. Consistency is one of the easiest ways to grow your audience. - Makes your workflow more professional
Scheduling gives you full control over your content calendar. You can plan posts around events, holidays, or marketing campaigns without rushing. It also helps maintain quality because you have time to review and polish each post before it goes live.
How to Schedule Blog Posts in WordPress (Step-by-Step Guide)
Scheduling blog posts in WordPress is simple and takes only a few minutes. Once you know where to find the right options, you can easily plan and publish your posts automatically. Follow these steps carefully, and you’ll never have to worry about missing a post again.
Step 1: Write your post in the WordPress editor
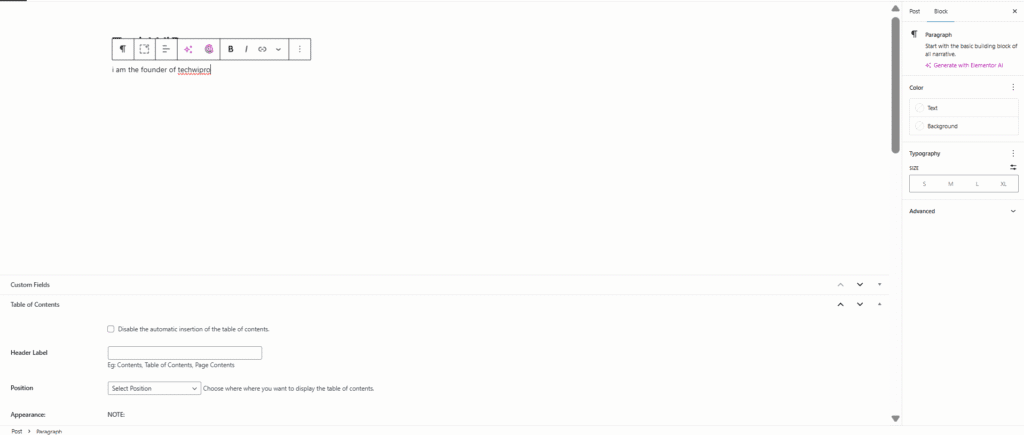
Start by creating your blog post as you normally would. Go to your WordPress dashboard, click on Posts → Add New, and begin writing your content. You can add text, images, headings, or anything else you need for your article.
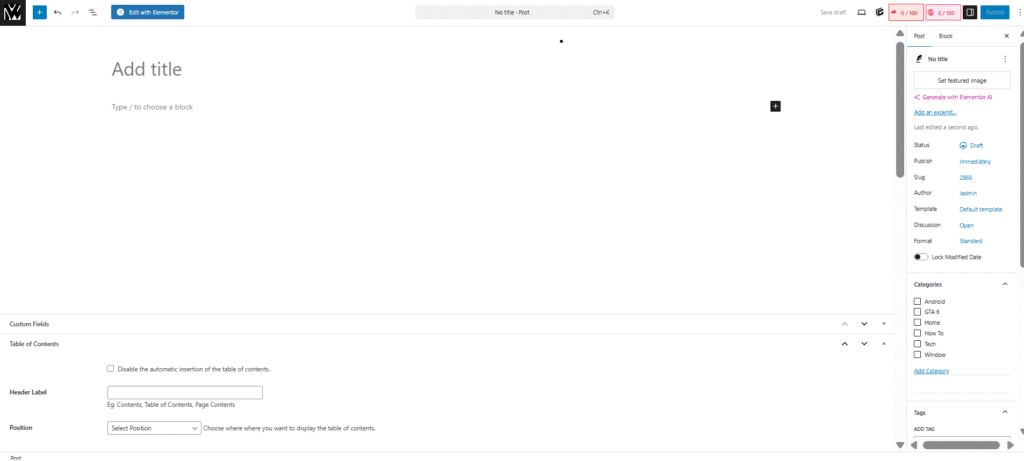
Take your time to proofread, check your grammar, and make sure your post is ready to go live. Once it looks perfect, you’re ready to set a schedule for it.
Step 2: Set the publish date and time
On the right side of your screen, you’ll see a section labeled “Post” or “Status & Visibility.” Under that, you’ll find an option that says “Publish Immediately.” Click on the small date and time link next to it.
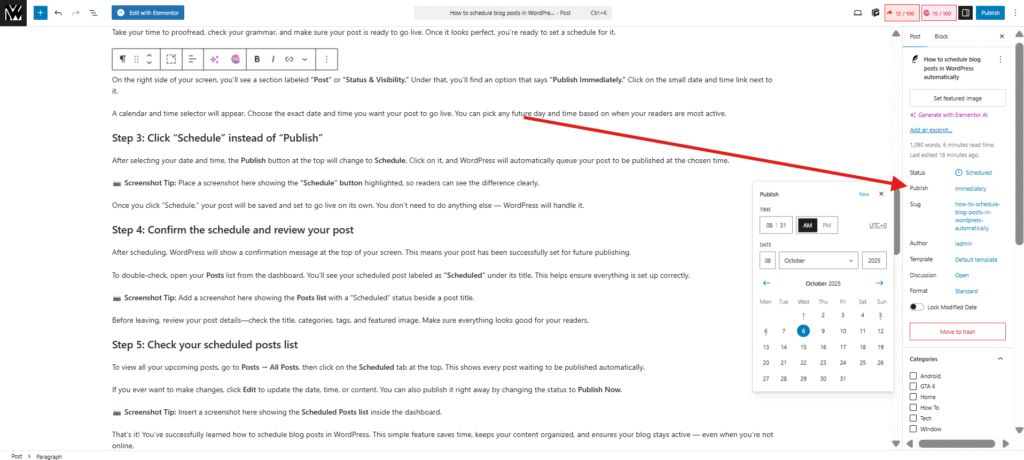
A calendar and time selector will appear. Choose the exact date and time you want your post to go live. You can pick any future day and time based on when your readers are most active.
Step 3: Click “Schedule” instead of “Publish”
After selecting your date and time, the Publish button at the top will change to Schedule. Click on it, and WordPress will automatically queue your post to be published at the chosen time.
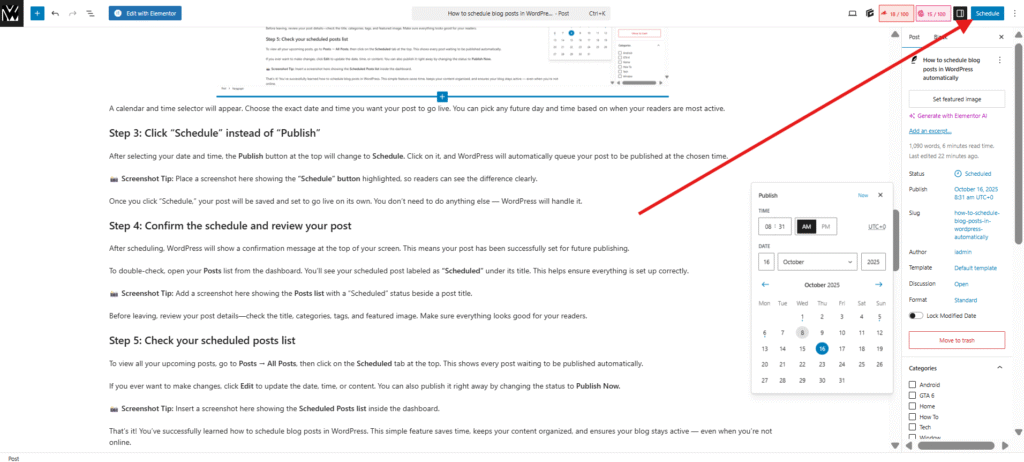
Once you click “Schedule,” your post will be saved and set to go live on its own. You don’t need to do anything else — WordPress will handle it.
Step 4: Confirm the schedule and review your post
After scheduling, WordPress will show a confirmation message at the top of your screen. This means your post has been successfully set for future publishing.
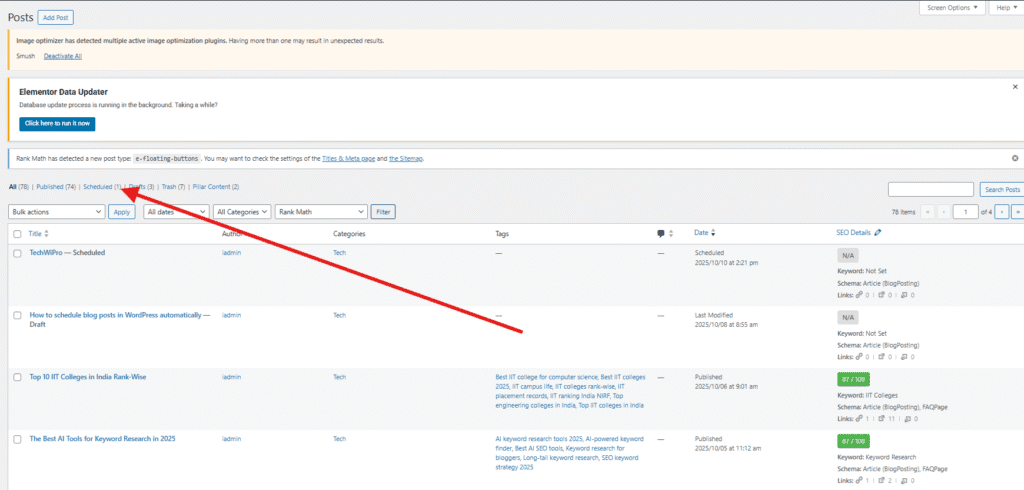
To double-check, open your Posts list from the dashboard. You’ll see your scheduled post labeled as “Scheduled” under its title. This helps ensure everything is set up correctly.
Before leaving, review your post details—check the title, categories, tags, and featured image. Make sure everything looks good for your readers.
Step 5: Check your scheduled posts list
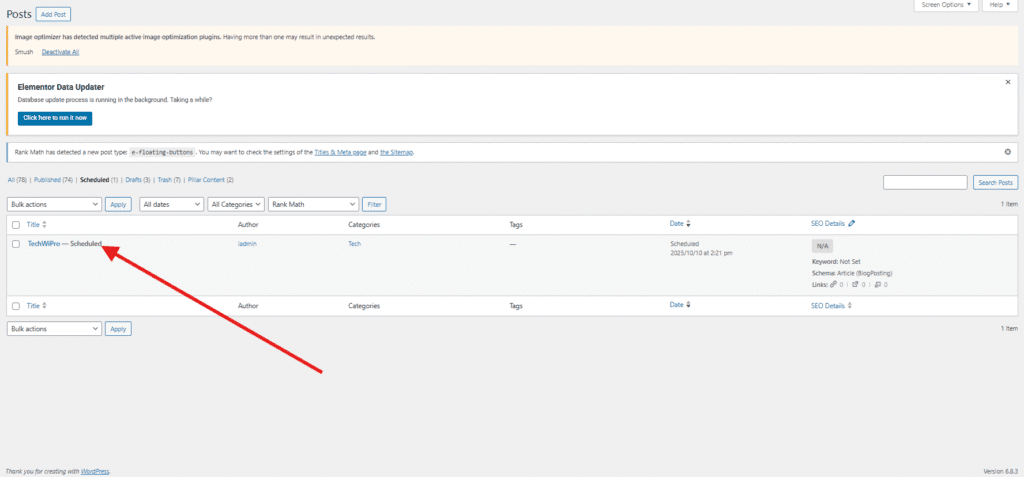
To view all your upcoming posts, go to Posts → All Posts, then click on the Scheduled tab at the top. This shows every post waiting to be published automatically.
If you ever want to make changes, click Edit to update the date, time, or content. You can also publish it right away by changing the status to Publish Now.
That’s it! You’ve successfully learned how to schedule blog posts in WordPress. This simple feature saves time, keeps your content organized, and ensures your blog stays active — even when you’re not online.
How to Edit or Unschedule a Post
Sometimes you may need to change your scheduled post after setting it up. WordPress makes it easy to edit the date, cancel the schedule, or publish your post immediately. Here’s how to manage each option quickly and clearly.
How to change the publish date and time
If you want to adjust when your post will go live, you can easily change its scheduled date or time.
- Go to your WordPress dashboard and open Posts → All Posts.
- Find the post labeled Scheduled and click Edit.
- On the right sidebar, locate the Publish section.
- Click the date and time settings to open the calendar.
- Choose your new date and time, then click Update.
Your post will now publish at the new time you selected. This is helpful if you want to match a new campaign, event, or time zone.
How to cancel a scheduled post
If you decide not to publish a post, you can unschedule it so it doesn’t go live automatically.
- Open the scheduled post in the WordPress editor.
- In the Publish section, click on the date and time link.
- Clear the scheduled date and set it back to the current time.
- Change the post status from Scheduled to Draft.
- Click Save Draft.
Your post is now unscheduled and saved as a draft. It will stay in your dashboard until you choose to publish or delete it.
How to manually publish it right away
If you want your scheduled post to go live immediately, you can publish it manually with one click.
- Go to Posts → All Posts in your dashboard.
- Hover over the scheduled post you want to publish.
- Click Quick Edit or Edit.
- Change the date and time to the current time or earlier.
- Click Publish.
Your post will appear on your site instantly. This is useful when you want to share something sooner than planned or take advantage of a trending topic.
Best Tips for Scheduling Blog Posts
Scheduling your blog posts is not just about setting a date and time — it’s about planning smartly so your content performs well and reaches more people. Here are a few simple tips to help you get the best results from your WordPress scheduling.
Pick the best posting time based on your audience
The time you publish your post can affect how many people see and read it.
- Look at your website analytics to see when your audience is most active.
- If your readers are mostly in one time zone, schedule your posts to go live during their peak hours.
- For global audiences, try posting during mid-day hours (like 10 AM to 2 PM) to reach the widest range of readers.
Use a content calendar to plan ahead
A content calendar helps you organize ideas and plan your posts for the week or month.
- Use tools like Google Sheets, Trello, or Notion to track topics, dates, and publishing status.
- Plan seasonal or event-based posts in advance to stay consistent.
- Review your calendar weekly to make sure everything is on track.
Having a visual schedule also helps you avoid repeating topics or missing important posting dates.
Keep 2–3 posts scheduled in advance
Having a few posts ready and scheduled gives you breathing room.
- Write and schedule at least two or three posts ahead of time.
- This ensures your blog stays active even if you get busy or face unexpected delays.
- You can use free time to create new ideas instead of rushing to publish.
This small habit builds consistency and keeps your blog running smoothly.
Review scheduled posts regularly for updates or errors
Before a post goes live, double-check that everything looks right.
- Revisit your scheduled posts list every few days.
- Make sure the title, links, images, and formatting are correct.
- Update any outdated information or broken links before publishing.
A quick review can prevent mistakes and ensure your readers always get accurate, high-quality content.
Useful Plugins for Post Scheduling
Using plugins can make scheduling blog posts in WordPress easier and more efficient. While WordPress has a built-in scheduling feature, plugins add extra tools and options that help you manage multiple posts, visualize your content calendar, and automate publishing more effectively.
Here are some of the top plugins for post scheduling:
- WP Scheduled Posts (SchedulePress)
This plugin allows you to schedule unlimited posts and manage them from a visual calendar. You can see all your planned posts in one place, drag and drop to reschedule, and even set auto-sharing on social media when posts go live. It is beginner-friendly and saves time for busy bloggers. - Editorial Calendar
Editorial Calendar gives you a simple drag-and-drop calendar to manage all your posts. You can quickly move posts to different dates, see which days are full or empty, and easily edit post titles and times. It helps you plan content visually and stay organized. - CoSchedule
CoSchedule is a powerful plugin for bloggers and businesses who want advanced scheduling features. It lets you schedule posts, manage marketing campaigns, and integrate social media promotion all in one place. This plugin is especially useful if you want to coordinate content across multiple channels.
Using these plugins can make your workflow smoother, keep your content organized, and save a lot of time. You can choose one based on your needs — WP Scheduled Posts for easy management, Editorial Calendar for a clear visual schedule, and CoSchedule for more advanced planning and marketing features.
Common Problems and How to Fix Them
Even though WordPress makes post scheduling simple, sometimes issues can occur. Understanding the common problems and how to fix them will help you keep your blog running smoothly.
Scheduled posts are not publishing automatically
Sometimes a post you scheduled does not go live at the set time. This usually happens because of server settings or conflicts with other plugins.
- Fix: Make sure your WordPress and plugins are updated. Deactivate plugins one by one to identify conflicts. If the problem continues, contact your hosting provider to check server time and cron jobs.
Time zone settings issues
If your posts are publishing at unexpected times, your WordPress time zone may not match your local time.
- Fix: Go to Settings → General → Timezone in your WordPress dashboard. Select the correct city or UTC offset. Save changes and check your scheduled posts again.
Caching or plugin conflicts
Caching plugins or optimization tools can sometimes prevent scheduled posts from publishing. They may serve an older version of your site instead of the updated post.
- Fix: Clear your cache from caching plugins or your browser. Temporarily deactivate caching or optimization plugins and test scheduling again. Most conflicts are resolved this way.
Quick tips to prevent issues
- Always keep WordPress, themes, and plugins updated.
- Avoid installing too many plugins that interfere with publishing or scheduling.
- Test scheduling with one post first before planning multiple posts.
- Regularly review your scheduled posts list to make sure everything is on track.
By understanding these common issues and knowing how to fix them, you can ensure your WordPress blog remains consistent and reliable. Proper settings and regular checks will save time and prevent frustration while keeping your content flowing smoothly to your audience.
Bonus: Automate Scheduling with External Tools
In addition to WordPress plugins, you can use external tools to automate your blog post scheduling. These tools help you plan, publish, and even share posts on social media without logging in every time.
Popular tools include Buffer, Hootsuite, and Jetpack.
- Buffer lets you schedule your posts and share them automatically on multiple social media platforms. You can plan a week or month in advance and see which posts perform best.
- Hootsuite is similar to Buffer but offers more detailed analytics and team collaboration features. It helps businesses manage social media and blog promotion in one place.
- Jetpack connects directly with WordPress. It can automatically share your scheduled posts on social media and track engagement. It also includes additional features like site backups and security.
Using these tools with WordPress has several advantages:
- You can save time by handling publishing and social sharing in one place.
- You can reach a wider audience by posting at optimal times across multiple platforms.
- You can track engagement and see how your content performs with detailed analytics.
However, there are some drawbacks to consider:
- Some tools require a paid subscription for advanced features.
- Connecting multiple tools can sometimes cause conflicts with plugins or WordPress settings.
- Learning a new tool may take time if you are new to automation.
By combining WordPress scheduling with external tools, you can streamline your workflow, maintain consistent posting, and expand your reach across social media. These tools are especially helpful if you manage multiple blogs or want to automate both your website and social channels efficiently.
Conclusion
Scheduling blog posts in WordPress helps you stay consistent, save time, and keep your content active even when you’re offline. It improves audience engagement, supports better SEO, and makes your blogging workflow more organized and professional.
By using WordPress’s built-in scheduling features or plugins and tools, you can plan your posts ahead, adjust timing as needed, and ensure every post goes live exactly when you want.
Start scheduling your next blog post today and experience the benefits of a smooth, stress-free publishing routine. Plan smart, post smart, and stay consistent.
What is WordPress post scheduling?
WordPress post scheduling allows you to set a specific date and time for your blog posts to publish automatically. Instead of posting immediately, you can write content in advance and let WordPress handle publishing. This feature is useful for maintaining consistency, reaching your audience at the best times, and saving time. Scheduling keeps your blog active even when you are busy or offline.
How do I schedule a blog post in WordPress?
To schedule a post in WordPress, start by writing your post in the editor. In the Publish section, click the date and time next to Publish Immediately. Set the desired date and time, then click Schedule instead of Publish. WordPress will automatically publish your post at the chosen time. You can edit or cancel the schedule anytime if needed.
Can I edit or unschedule a WordPress post?
Yes, WordPress allows you to change the publish date or unschedule posts easily. Open the scheduled post in the editor, adjust the date and time in the Publish section, or change the status to Draft to unschedule it. You can also publish it manually immediately if needed. These options give full control over your publishing schedule and ensure your content goes live at the right time.
What plugins can help with scheduling posts in WordPress?
Several plugins make post scheduling easier. WP Scheduled Posts (SchedulePress) offers a visual calendar and auto-social sharing. Editorial Calendar lets you drag and drop posts to different dates for clear planning. CoSchedule integrates content scheduling with marketing campaigns and social media. Using these plugins helps organize your blog, save time, and maintain consistent posting, even when managing multiple posts at once.